ikun伙伴匹配系统2
大约 6 分钟约 1652 字
ikun伙伴匹配系统
前端整合路由
https://router.vuejs.org/zh/installation.html
安装
vue-router
yarn add vue-router@4
配置类route.ts
import * as VueRouter from 'vue-router'

import Index from "../pages/Index/index.vue";
import Team from "../pages/Team/index.vue";
import User from "../pages/User/index.vue";

const routes = [
    {path: '/', component: Index},
    {path: '/team', component: Team},
    {path: '/user', component: User},
]

const router = VueRouter.createRouter({
    history: VueRouter.createWebHashHistory(),
    routes, // `routes: routes` 的缩写
})

export default router
搜索页面
前端vue
    <van-nav-bar
        title="标题"
        left-text="返回"
        right-text="按钮"
        left-arrow
        @click-left="onClickLeft"
        @click-right="onClickRight"
    >
        <template #right>
            <van-icon name="search" size="18"/>
        </template>
    </van-nav-bar>


    <div id="content">
        <router-view/>
    </div>

    <van-tabbar v-model="active" @change="onChange" route>
        <van-tabbar-item icon="home-o" name="index" to="/">主页</van-tabbar-item>
        <van-tabbar-item icon="search" name="team" to="/team">队伍</van-tabbar-item>
        <van-tabbar-item icon="friends-o" name="user" to="/user">个人</van-tabbar-item>
    </van-tabbar>
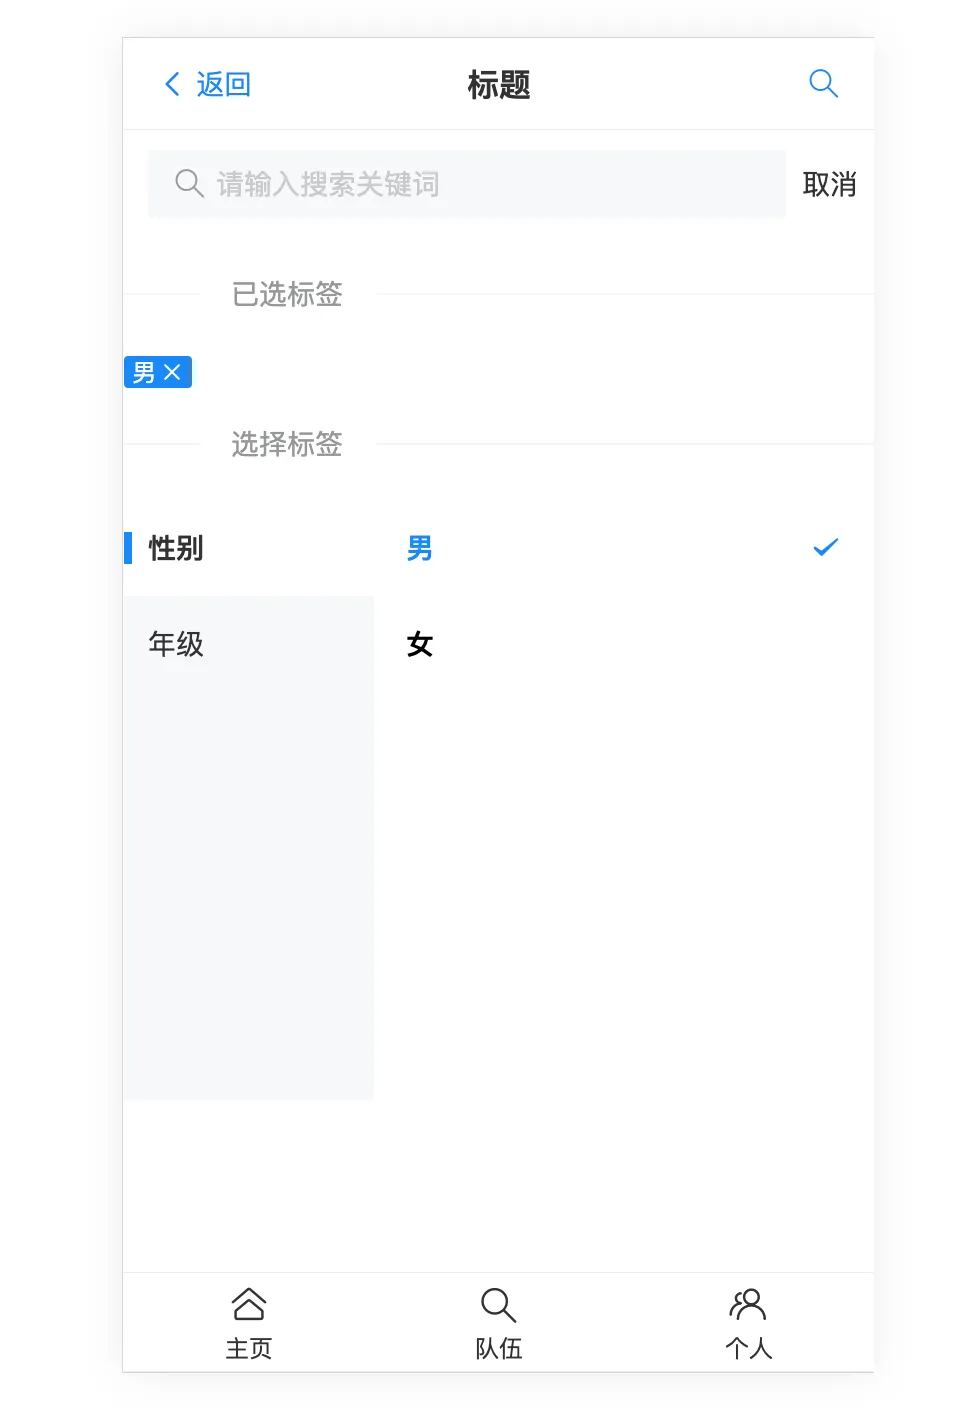
添加选择标签组件:
<van-divider content-position="left">已选标签</van-divider>

<template v-if="activeIds.length===0">请选择标签</template>

<van-row gutter="16">
    <van-col v-for="tag in activeIds">
        <van-tag closeable size="small" type="primary" @close="doClose(tag)">
            {{ tag }}
        </van-tag>
    </van-col>
</van-row>

<van-divider content-position="left">选择标签</van-divider>

<van-tree-select
    v-model:active-id="activeIds"
    v-model:main-active-index="activeIndex"
    :items="filterTagList"
/>
ts代码
//搜索框文字
const searchText = ref('');
//已选中标签
const activeIds = ref([]);
//当前激活的标签
const activeIndex = ref(0);
const tagList = [
    {
        text: '性别',
        children: [
            {text: '男', id: '男'},
            {text: '女', id: '女'},
        ],
    },
    {
        text: '年级',
        children: [
            {text: '大一', id: '大一'},
            {text: '大二', id: '大二'},
        ],
    },
]
const filterTagList = ref(tagList);

//搜索 过滤
const onSearch = () => {
    filterTagList.value = tagList.map(parentTag => {
        const tempChildren = [...parentTag.children];
        const tempParentTag = {...parentTag};
        tempParentTag.children = tempChildren.filter(childTag => {
            return childTag.text.includes(searchText.value);
        });
        return tempParentTag;
    });

}

//清空搜索框
const onCancel = () => {
    showToast('取消');
    searchText.value = '';
    filterTagList.value = tagList;
}

//关闭标签
const doClose = (tag) => {
    activeIds.value = activeIds.value.filter(item => {
        return item !== tag;
    });
}
效果如下:
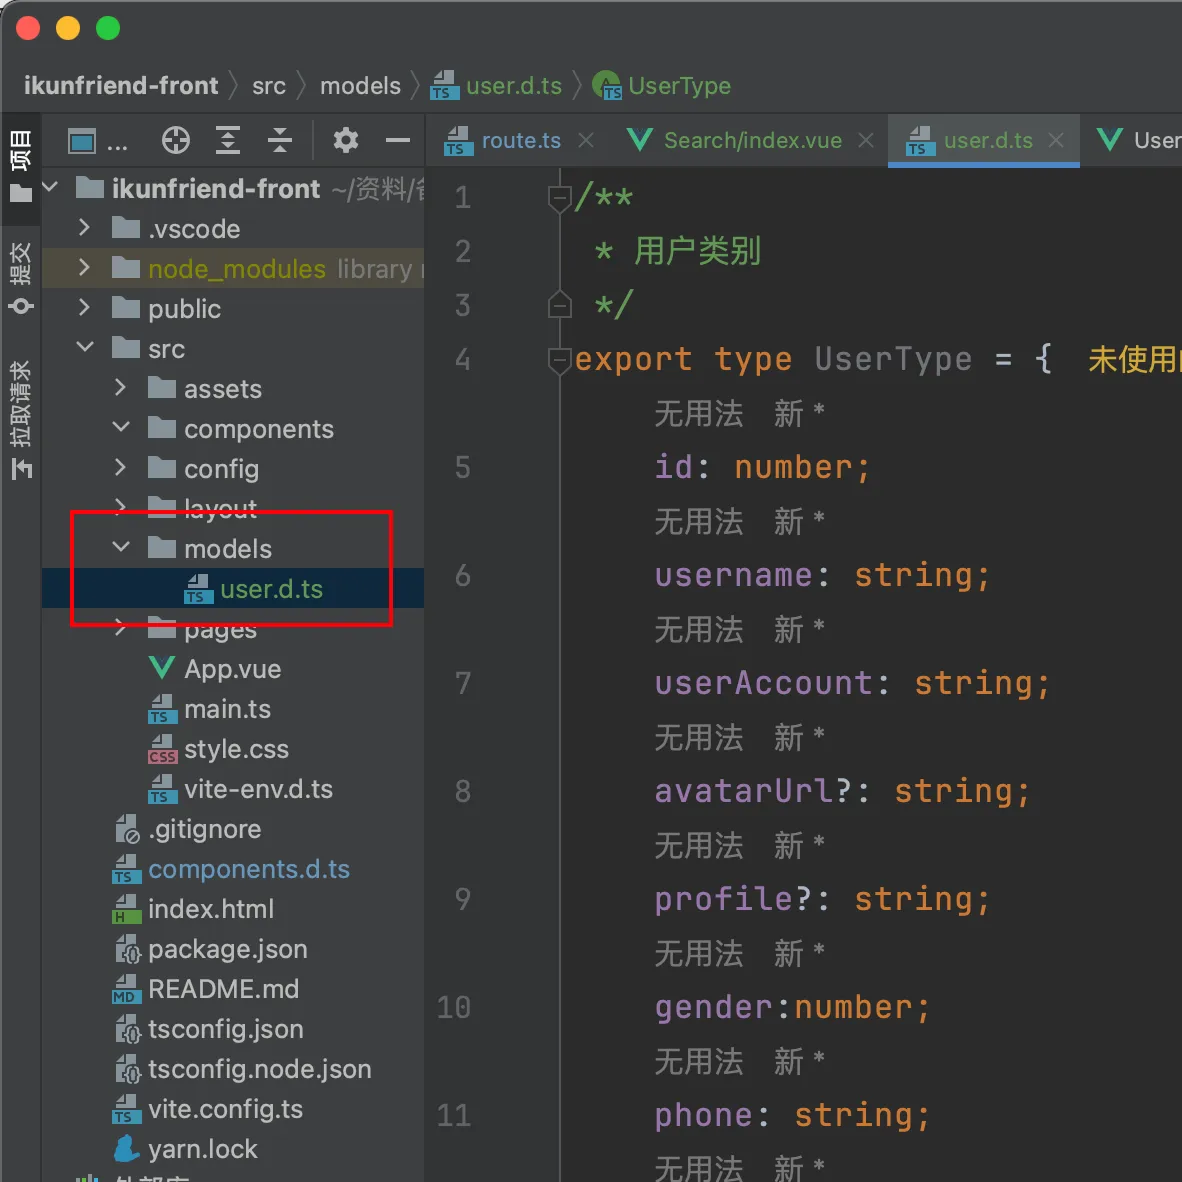
新建一个用户模型
user.d.ts
/**
 * 用户类别
 */
export type UserType = {
    id: number;
    username: string;
    userAccount: string;
    avatarUrl?: string;
    profile?: string;
    gender:number;
    phone: string;
    email: string;
    userStatus: number;
    userRole: number;
    planetCode: string;
    tags: string;
    createTime: Date;
};
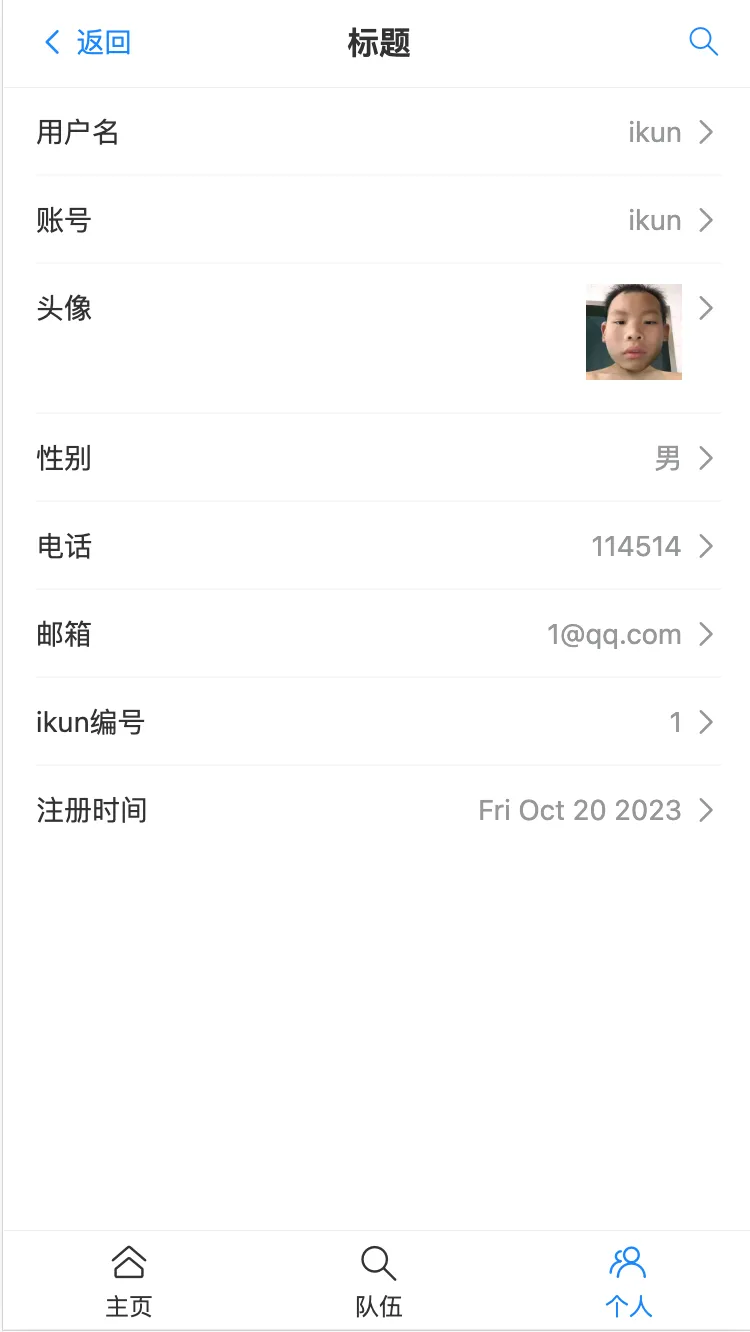
个人页面
vue页面:
<template>
    <van-cell title="用户名" is-link :value="user.username"
              @click="toEdit('username','用户名',user.username)"/>
    <van-cell title="账号" is-link :value="user.userAccount"/>
    <van-cell title="头像" is-link :value="user.avatarUrl">
        <VanImage :src="user.avatarUrl" height="48px" alt="cxk"/>
    </van-cell>
    <van-cell title="性别" is-link :value="user.gender"
              @click="toEdit('gender','性别',user.gender)"/>
    <van-cell title="电话" is-link :value="user.phone"
              @click="toEdit('phone','电话',user.phone)"/>
    <van-cell title="邮箱" is-link :value="user.email"
              @click="toEdit('email','邮箱',user.email)"/>
    <van-cell title="ikun编号" is-link :value="user.ikunCode"/>
    <van-cell title="注册时间" is-link :value="user.createTime.toDateString()"/>
</template>
ts路由跳转传参:
<script setup lang="ts">
import {useRouter} from "vue-router";

const user = {
    id: 1,
    username: 'ikun',
    userAccount: 'ikun',
    avatarUrl: "https://s2.loli.net/2023/10/16/QRiUYmDLB2vZuE6.webp",
    gender: '男',
    phone: "114514",
    email: "1@qq.com",
    ikunCode: 1,
    createTime: new Date()
}

const router = useRouter();

const toEdit = (editKey: string, editName: string, currentValue: string) => {
    router.push({
        path: '/user/edit',
        query: {
            editKey,
            editName,
            currentValue,
        }
    })
}

</script>
效果如下:
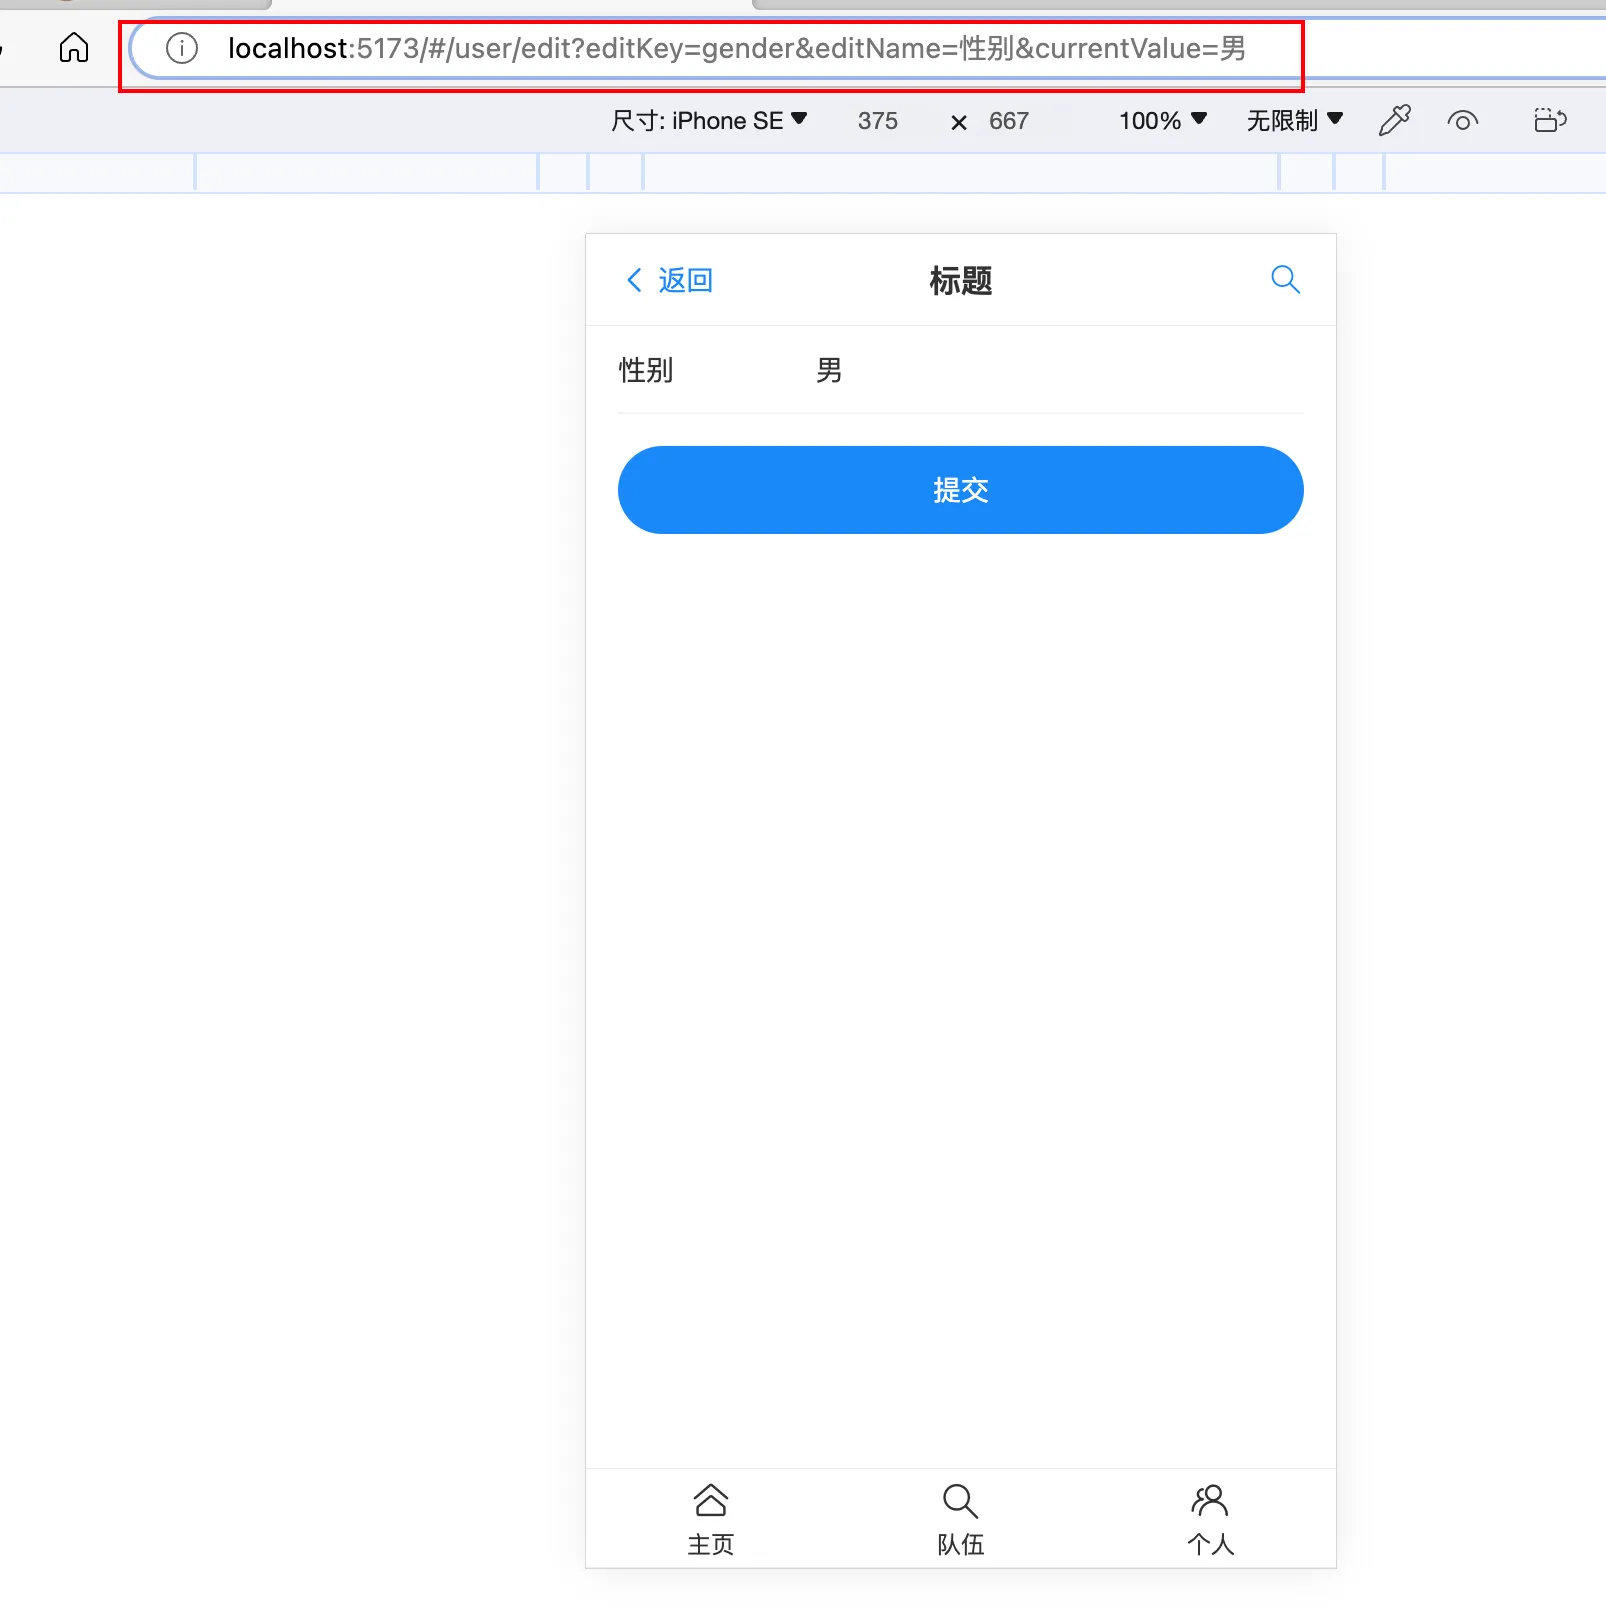
编辑页面
vue
<template>
    <van-form @submit="onSubmit">
        <van-field
            v-model="editUser.currentValue"
            :name="editUser.editKey"
            :label="editUser.editName"
            :placeholder="`请输入${editUser.editName}`"
        />
        <div style="margin: 16px;">
            <van-button round block type="primary" native-type="submit">
                提交
            </van-button>
        </div>
    </van-form>

</template>
ts逻辑:
<script setup lang="ts">

import {useRoute} from "vue-router";
import {ref} from "vue";

const route = useRoute();
const editUser = ref({
    editKey: route.query.editKey,
    editName: route.query.editName,
    currentValue: route.query.currentValue
})
console.log(route.query)

const onSubmit = (values) => {
    //todo 提交到后台
    console.log('onSubmit', values)
}

</script>
效果如下:
后端
什么是接口文档?写接口信息的文档,每条接口包括:
- 请求参数
- 响应参数
- 错误码
- 接口地址
- 接口名称
- 接口类型
- 请求格式
- 备注
一般是后端或者负责人来提供,后端和前端都要用
- 便于沉淀和维护
- 便于前端和后端对接,前后端联调
- 在线测试,作为工具
怎么做:
- 手写
- 自动化接口文档生成 postman ,swagger,apifox,apipost
后端整合Swagger+Knife4j接口文档
导入包:
        <dependency>
            <groupId>com.github.xiaoymin</groupId>
            <artifactId>knife4j-spring-boot-starter</artifactId>
            <version>2.0.7</version>
        </dependency>
自定义配置类:
package com.yunfei.ikunfriend.config;

import org.springframework.context.annotation.Bean;
import org.springframework.context.annotation.Configuration;
import springfox.documentation.builders.ApiInfoBuilder;
import springfox.documentation.builders.PathSelectors;
import springfox.documentation.builders.RequestHandlerSelectors;
import springfox.documentation.spi.DocumentationType;
import springfox.documentation.spring.web.plugins.Docket;
import springfox.documentation.swagger2.annotations.EnableSwagger2WebMvc;

@Configuration
@EnableSwagger2WebMvc
@Profile({"dev","test"})
public class Knife4jConfiguration {

    @Bean(value = "defaultApi2")
    public Docket defaultApi2() {
        Docket docket=new Docket(DocumentationType.SWAGGER_2)
                .apiInfo(new ApiInfoBuilder()
                        //.title("swagger-bootstrap-ui-demo RESTful APIs")
                        .description("# swagger-bootstrap-ui-demo RESTful APIs")
                        .termsOfServiceUrl("http://www.xx.com/")
                        .contact("xx@qq.com")
                        .version("1.0")
                        .build())
                //分组名称
                .groupName("2.X版本")
                .select()
                //这里指定Controller扫描包路径
                .apis(RequestHandlerSelectors.basePackage("com.yunfei.ikunfriend.controller"))
                .paths(PathSelectors.any())
                .build();
        return docket;
    }
}
注意:springboot2.6和swagger不兼容,需要增加配置application.yml
spring:
  mvc:
    pathmatch:
      matching-strategy: ANT_PATH_MATCHER
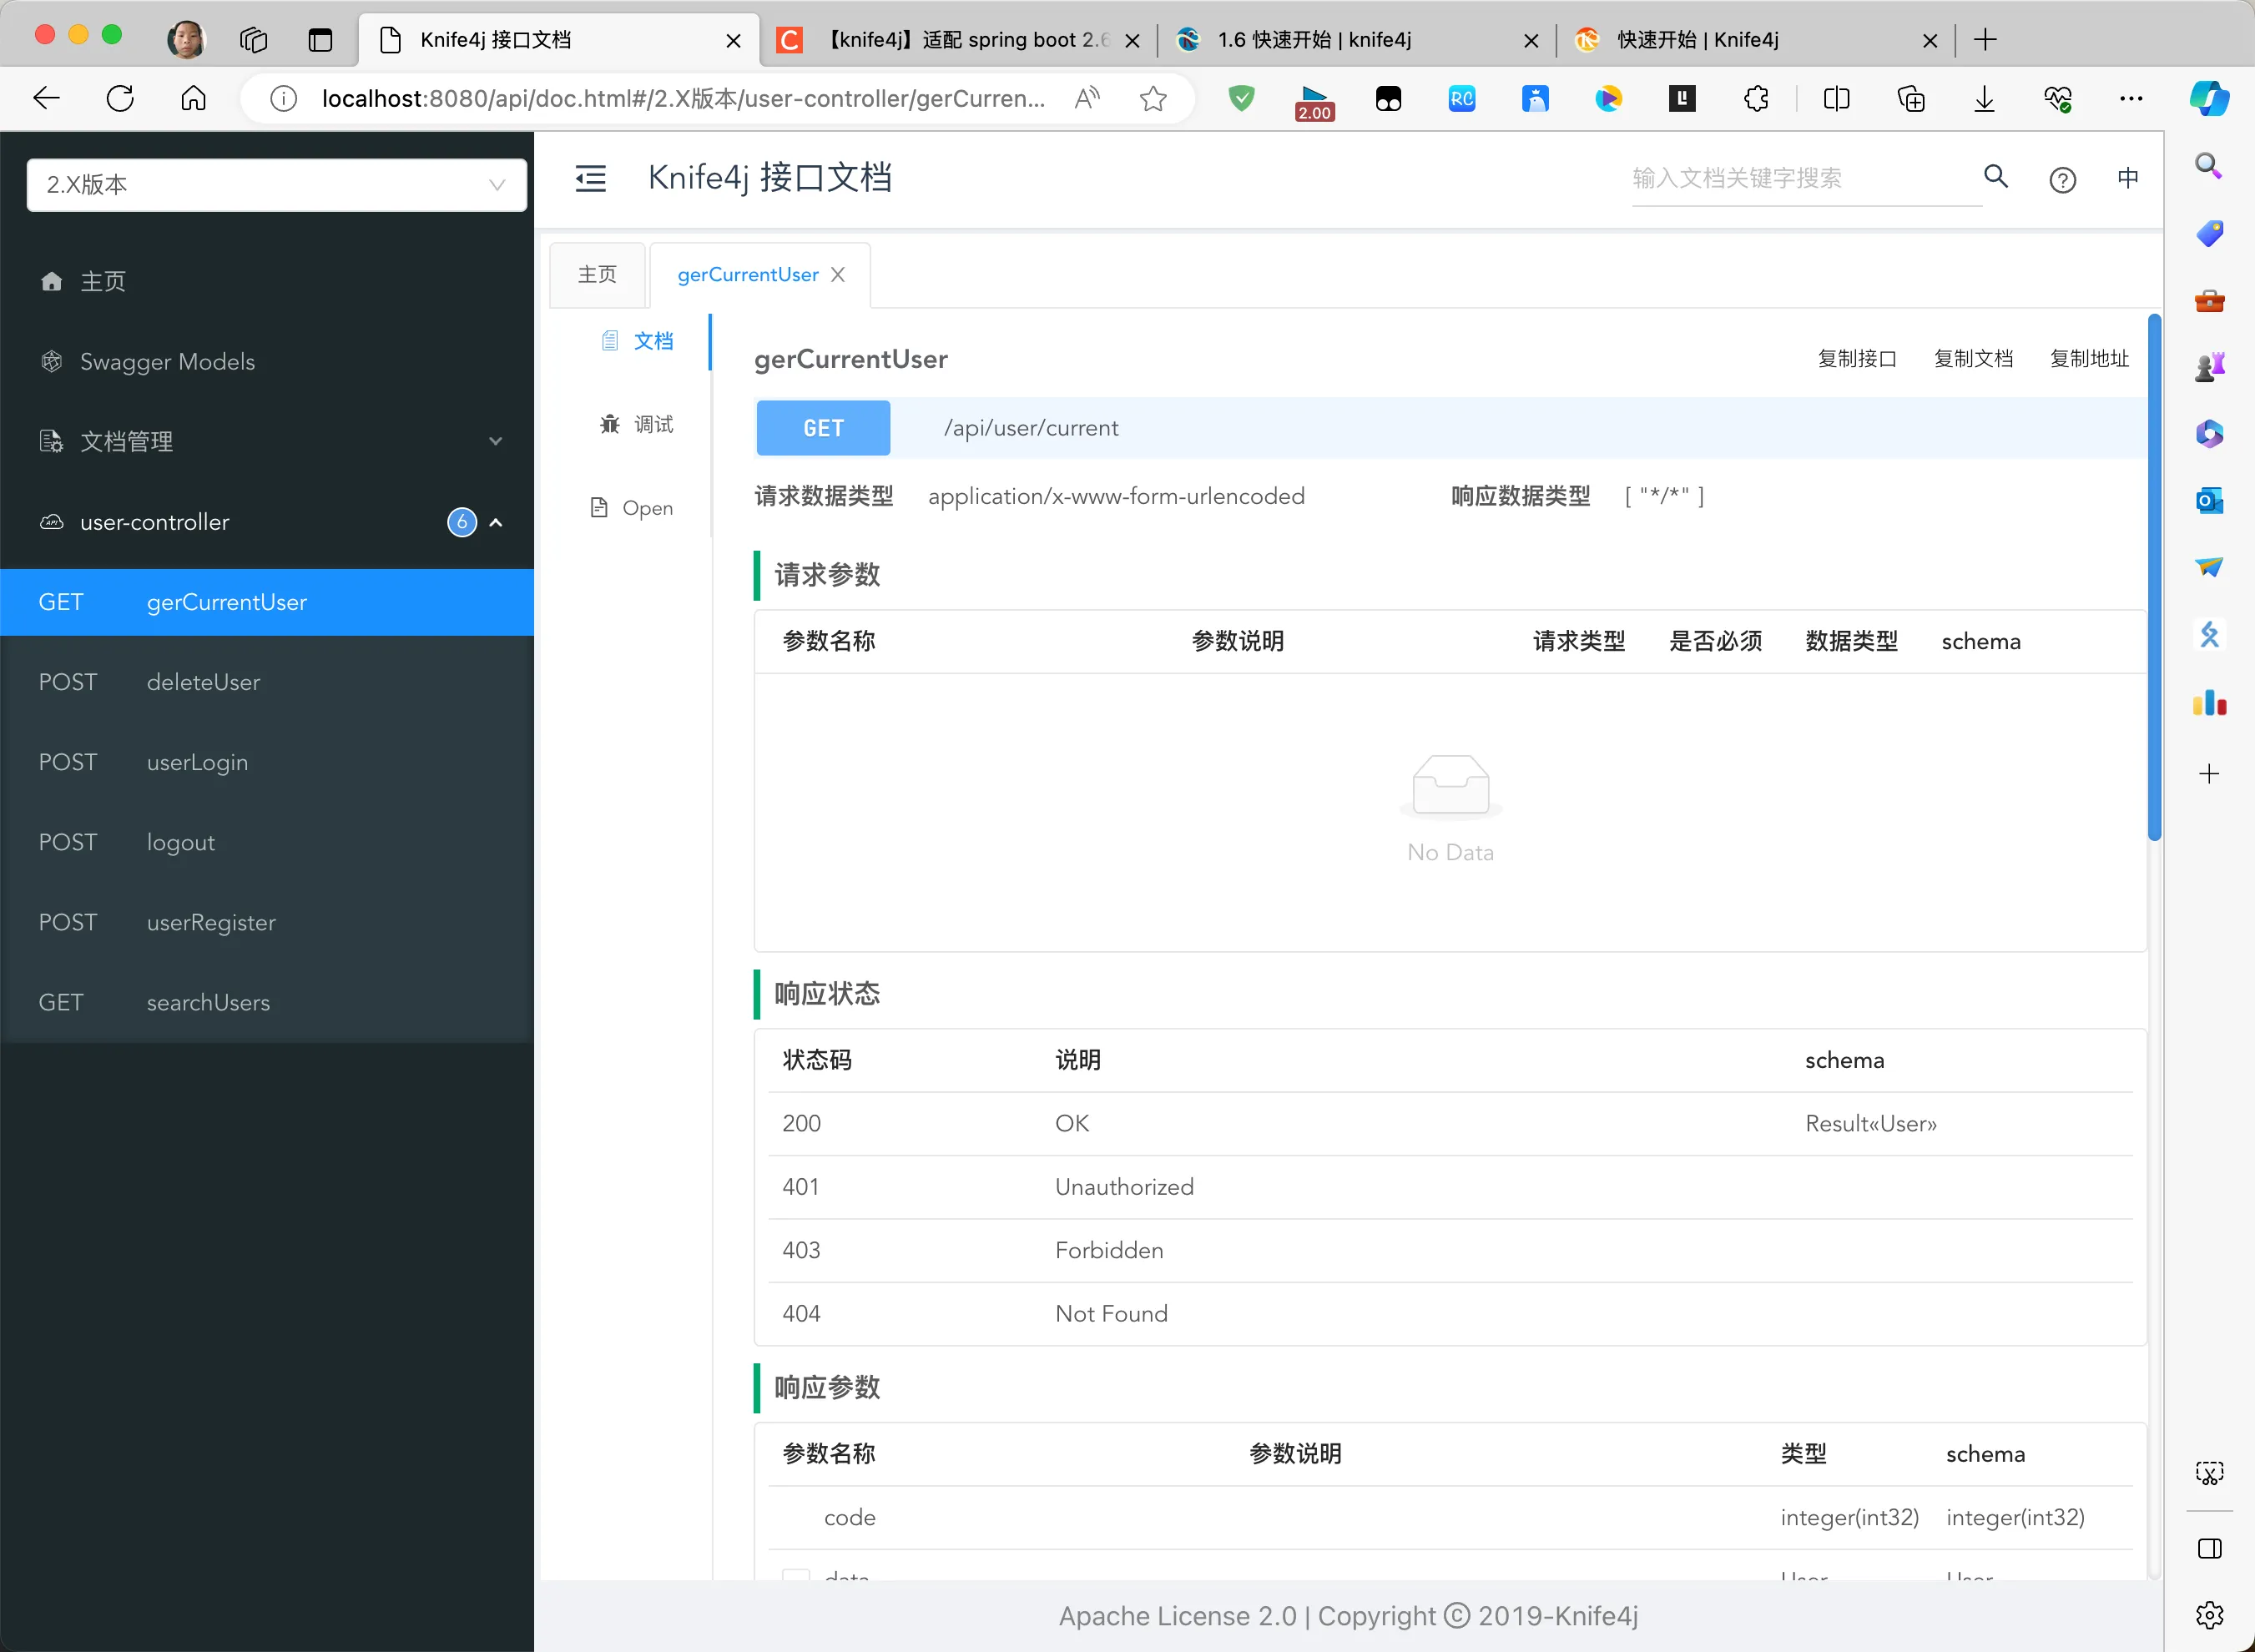
访问链接:http://localhost:8080/api/doc.html
成功:
爬虫
前端json插件

复制爬虫链接:
curl 'https://api.zsxq.com/v2/hashtags/51122528418454/topics?count=20' \
  -H 'authority: api.zsxq.com' \
  -H 'accept: application/json, text/plain, */*' \
  -H 'accept-language: zh-CN,zh;q=0.9,en-US;q=0.8,en;q=0.7,en-GB;q=0.6' \
  -H 'cache-control: no-cache' \
  -H 'origin: https://wx.zsxq.com' \
  -H 'pragma: no-cache' \
  -H 'referer: https://wx.zsxq.com/' \
  -H 'sec-ch-ua: "Chromium";v="118", "Microsoft Edge";v="118", "Not=A?Brand";v="99"' \
  -H 'sec-ch-ua-mobile: ?0' \
  -H 'sec-ch-ua-platform: "macOS"' \
  -H 'sec-fetch-dest: empty' \
  -H 'sec-fetch-mode: cors' \
  -H 'sec-fetch-site: same-site' \
  -H 'user-agent: Mozilla/5.0 (Macintosh; Intel Mac OS X 10_15_7) AppleWebKit/537.36 (KHTML, like Gecko) Chrome/118.0.0.0 Safari/537.36 Edg/118.0.2088.57' \
  --compressed
- 用程序去调用接口
- 清洗数据,写到数据库
EasyExcel
导入excel信息:
官网:https://easyexcel.opensource.alibaba.com/
        <dependency>
            <groupId>com.alibaba</groupId>
            <artifactId>easyexcel</artifactId>
            <version>3.1.0</version>
        </dependency>
两种读方式:
- 确定表头:建立对象
- 不确定表头:每一行数据映射为Map<String,Object>
第一种方式
创建对象:
@Data
public class iKun {
    @ExcelProperty("ikun编号")
    private String ikunCode;
    @ExcelProperty("ikun名称")
    private String username;
}
创建监听器:
@Slf4j
public class TableListener implements ReadListener<iKun> {


    /**
     * 这个每一条数据解析都会来调用
     */
    @Override
    public void invoke(iKun data, AnalysisContext context) {
        System.out.println("解析到一条数据:{}" + data);

    }

    /**
     * 所有数据解析完成了 都会来调用
     */
    @Override
    public void doAfterAllAnalysed(AnalysisContext context) {
        System.out.println("以解析完成");

    }
}
主程序:
@Slf4j
public class ImportExcel {
    public static void main(String[] args) {
        // 写法1:JDK8+ ,不用额外写一个DemoDataListener
        // since: 3.0.0-beta1
        String fileName = "/Users/houyunfei/资料/备战秋招/ikun伙伴匹配系统/ikunfriend-back/src/main/resources/testExcel.xlsx";
        // 这里默认每次会读取100条数据 然后返回过来 直接调用使用数据就行
        // 具体需要返回多少行可以在`PageReadListener`的构造函数设置
        EasyExcel.read(fileName, iKun.class, new TableListener()).sheet().doRead();
    }
}
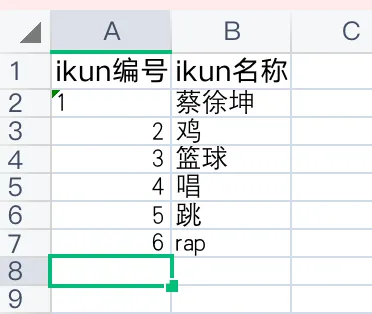
Excel表格内容为:
读取结果:

第二种方式
使用同步读取:
    public static void main(String[] args) {
        synchronousRead ();
    }

    public static void synchronousRead() {
        // 这里 需要指定读用哪个class去读,然后读取第一个sheet 同步读取会自动finish
        List<iKun> totalList = EasyExcel.read(fileName).head(iKun.class).sheet().doReadSync();
        for (iKun iKun : totalList) {
            System.out.println(iKun);
        }
    }
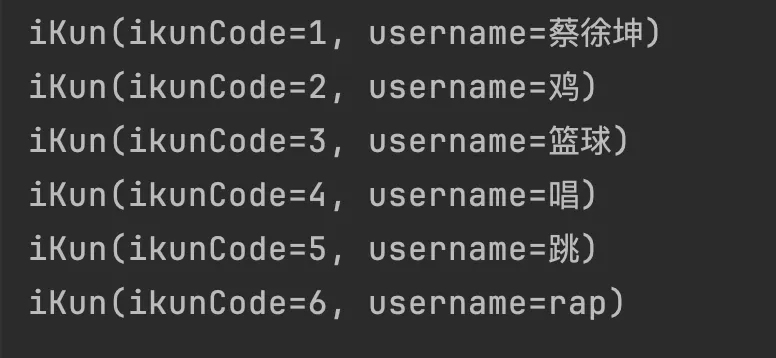
运行结果:
两种读取模式:
- 监听器:先创建监听器,在读取文件时绑定监听器,单独抽离处理逻辑,代码清晰易于维护,一条一条处理,适用于数据量大的场景
- 同步读,无需创建监听器,一次性要获取完整数据,方便简单,数据量大的时候卡顿
